
A new feature included in Windows Server 2012 is data deduplication. Windows 2012 deduplication segments files into small chunks and stores any duplicate chunks as a single chunk to save on space. The chunks are between 32 and 128 KB in size. Data deduplication can only be enabled on NTFS. Also, deduped drives cannot be system or boot volumes. Using the deduplication that is built into Windows Server 2012 can be a quick and easy way to clear up disk space depending on your needs.
There is also a nice utility you can run called ddpeval.exe which can be run locally or against a remote server to see what you savings would be using deduplication before deploying. I cover that topic in another blog that can be found here.
To install deduplication on a Windows 2012 Server all you need to do is open PowerShell as Administrator and run the following command:
Install-WindowsFeature FS-Data-Deduplication
To enable Deduplication type the following command in PowerShell:
Enable-DedupVolume e:

The above command will enable data deduplication on the E drive.
If you want to get a list of volumes that have deduplication enabled you can type:
Get-DedupVolume
If you want to also see the dedup settings and volume settings you can type the following:
Get-DedupVolume | fl
As you can see in the illustration below, you can get the settings such as “MinimumFileAgeDays” which is the amount of days since a file was last modified before it is deduped (Default is 5 days) and the “MinimumFileSize” (minimum size of a file which can be deduped) which is 32KB. There is also an option for “ExcludeFolder” and “ExcludeFileType”.

NOTE: If you set MinimumFileAgeDays to 0 days, it will process all files no matter their age.
If you want to change the “MinimumFileAge” for instance, you could type the following command:
Set-Dedupvolume E: -MinimumFileAgeDays 0
To see the schedule for deduplication you can run the following command:
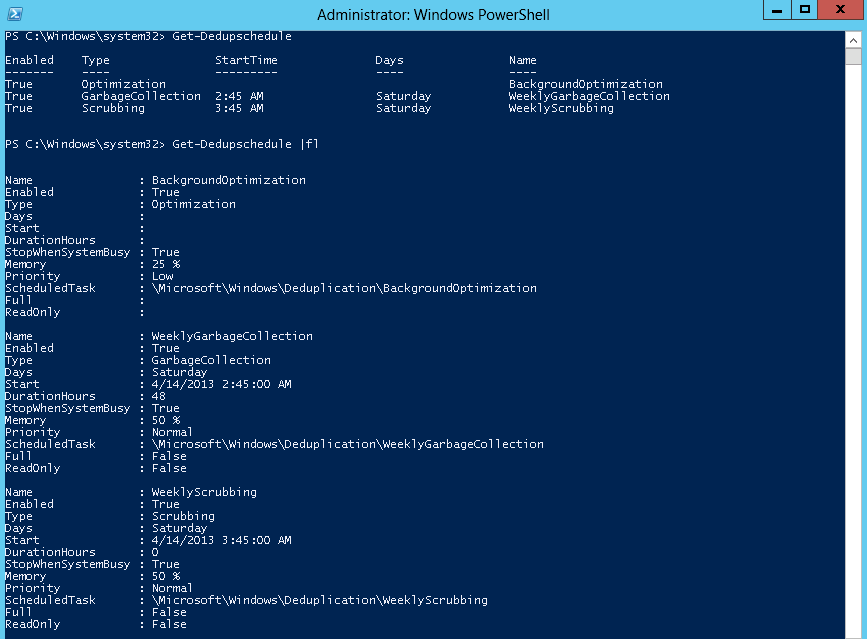
Get-Dedupschedule
To see detailed information about the schedule you can type the following command:
Get-Dedupschedule | fl
As you can see from the illustration below there are 3 job types.
1. Optimization- Runs once an hour. This job deduplicates and compresses file chunks on the volume.
2. Garbage Collection- Runs once a week. Removes any chunk files that are no longer referenced to reclaim space.
3. Scrubbing- Runs once a week. Verifies data integrity and attempts to fix any corruption it finds.
You can also look in Windows Task Scheduler and you will see the 3 jobs set up under deduplication as shown below. One thing I noticed is that all 3 tasks were scheduled to start the next the morning following the date I enabled dedup. I enabled deduplication on 4/13/2013 and all tasks where set to start on 4/14/2014.

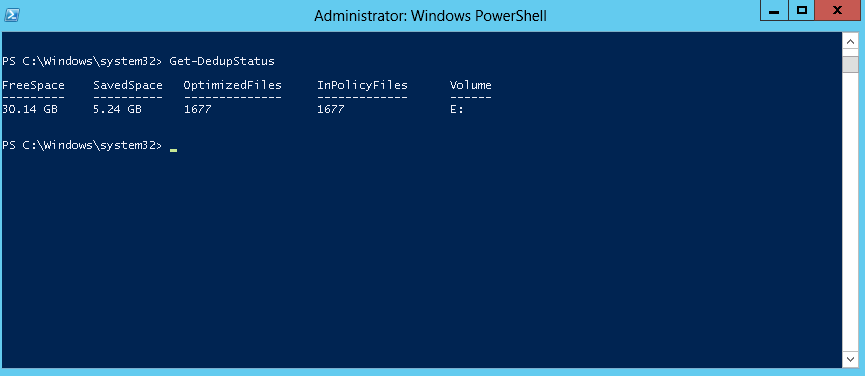
After the background optimization runs for the first time, you can run the “Get-DedupStatus” cmdlet to see your dedup savings as shown below. I was able to recoup 5.24 GBs of space on my E drive. Remember, you may not see dedup savings right away depending on your “MinimumFileAgeDays” setting. To push thinks along and see the savings right away, I changed the MinimumFileAgeDays to 0 for the purposes of this example.
If you wanted to kick off a deduplication optimization job right away, you could type the following command:
Start-DedupJob –Volume E: –Type Optimization
You may have a case where you may want to run a Garbage collection job right away. One example would be if you were running dangerously low on the deduped volume and needed to clean up space by removing unused chunks. You could type the following command:
Start-DedupJob –Volume E: –Type GarbageCollection –full
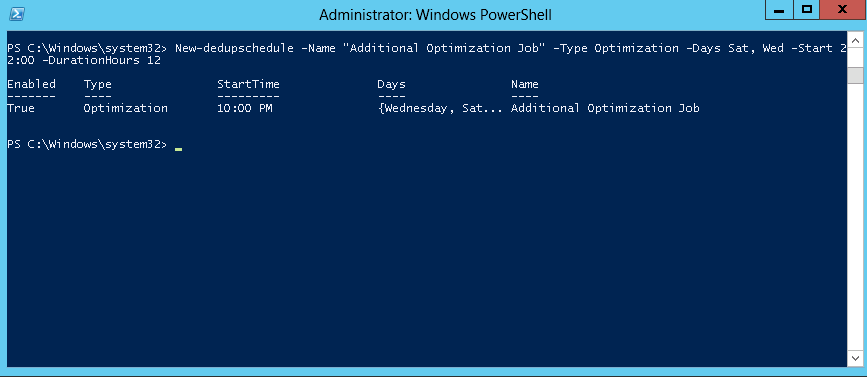
If you wanted to schedule additional jobs to run off hours let’s say, you could use the “New-DedupSchedule” cmdlet. For example, you could run the command below to add an additional optimization job named “Additional Optimization Job” on Saturday and Wednesday evenings at 10 PM for a duration of no longer than 12 hours.
New-dedupschedule -Name “Additional Optimization Job” -Type Optimization -Days Sat, Wed -Start 22:00 -DurationHours 12
Successful completion of this command will display the output as shown below.
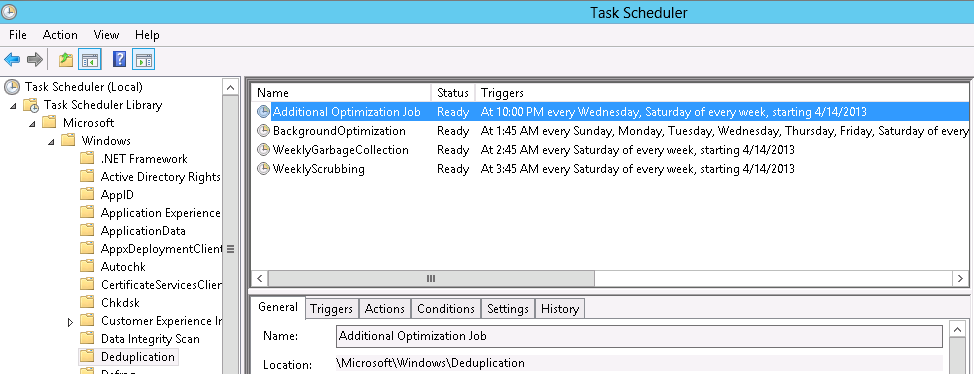
If you look in the Windows Task Scheduler you will see the new job configured there under Deduplication as illustrated below.
I hope this helps. If you want more information on Windows Server 2012 Deduplication feature you can visit Microsoft’s TechNet site. As always, if you have any questions or feedback, please leave a comment.
Related Links:
Pingback: The World According to Gabe