
In this blog, I will be explaining the steps using the “Diskpart” to create a bootable USB key. Creating bootable USB keys has become increasingly important since many servers and laptops are now shipped without a DVD ROM.
Logon to your laptop or desktop with an account that has local admin right, insert the USB key to be used and follow the steps below.
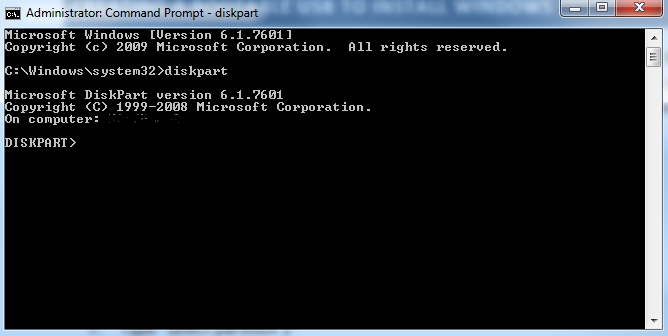
Open a command prompt as administrator type “diskpart” and press enter as shown below.
Now type the following commands to create your bootable USB Key:
Type “list disk” (press enter)

Type “select disk 1” (press enter)
Note: The disk number you choose could vary depending on the amount of disk you may have attached. Shown above, we are using 14 GB USB drive. Looking for the disk that matches the size drive for the USB key you inserted may be the easiest way to recognize it.

Type “clean” (press enter)

Type “create partition primary” (press enter)

Type “select partition 1” (press enter)

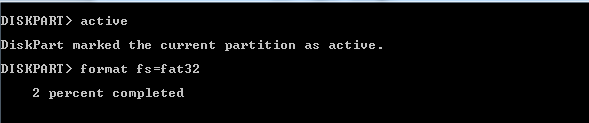
Type “active” (press enter)

Type “format fs=fat32” (press enter) (this step will take time to complete)
Type “assign” (press enter)

Type “exit” (press enter)

You are done. Once completed you can copy the files from an install DVD or mounted ISO (for example Windows 2008 R2 etc…) to the newly created bootable USB. You can then set the BIOS of the machine to boot to USB if supported.
I hope this helps. As always, if you have any questions or feedback, please leave a comment. Thanks.