
Once you’ve created your Azure Affinity Groups it’s fairly simple to assign Azure Resources to a specific Affinity Group. First step is to add your virtual network and storage accounts to the Affinity Group. I will post articles on adding storage and network resources to Affinity groups shortly.
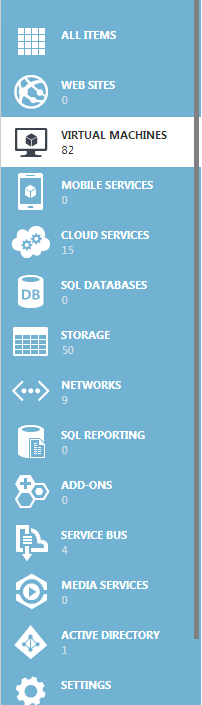
This article assumes you have created an image to build an Azure VM from. Highlight Virtual Machines on the left side of the Azure console.
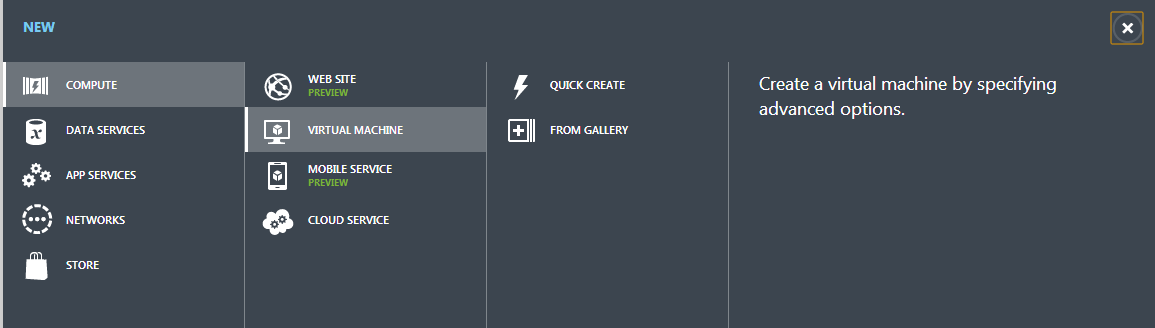
Click the “New” button in the lower left corner.
![]()
For this example we will choose a system “From Gallery”.
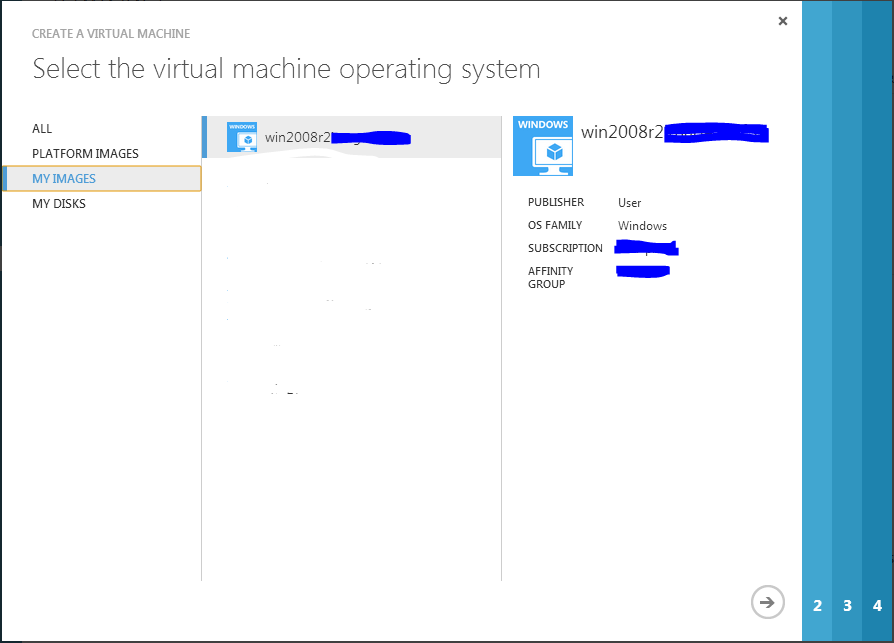
We will choose the win2008r2 image from “My Images”. Click the -> in the lower right hand corner. Notice that the image has already been placed in an Affinity Group. This is because the image was created on a storage account that was assigned to an Affinity Group already.
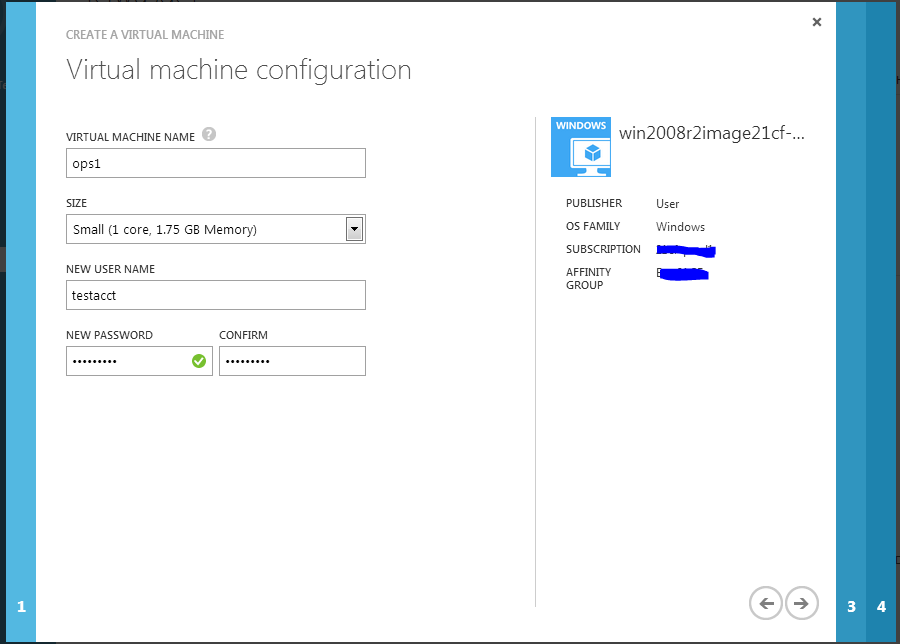
Specify a name, size, user name, and password for the new VM. Click the -> in the lower right hand corner.
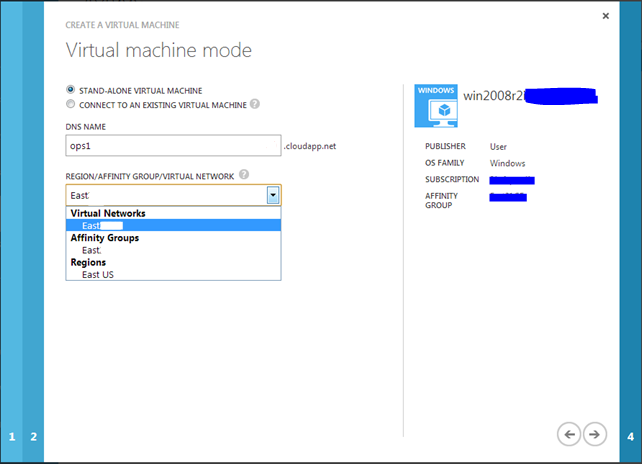
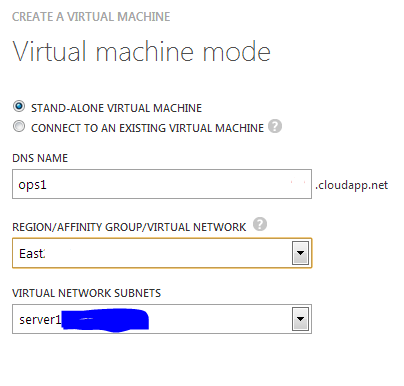
Specify the DNS Name and either the Affinity Group or Virtual network you want to assign the machine to. As we have a Virtual network created for our systems that is already assigned to an Affinity Group we will choose the “East” Virtual network.
**On a side note this is an area where we had run into some confusion. As the Virtual Network gets assigned to an Affinity Group the thought was to select the Affinity Group instead of the Virtual Network. It ends up being the opposite. Doing that puts the machine into the specified Affinity Group but doesn’t attach it to your Virtual Network.**
This system is now located in the US East datacenter as it is part of a Virtual Network and Storage Account that were assigned to our East Affinity Group. If this was an application server and we wanted to build in a multi-site level of redundancy we would build another set of machines and have them assigned to a Virtual Network and Storage Account that are part of our West Affinity Group. Then you can load balance the application between multiple Azure datacenters using Azure Traffic Manager or other DNS load balancing services. I’ve been testing a Dyn (Dynect) DNS load balancing service called Active Failover which so far has worked very well and is very easy to setup.
We will detail DNS Load Balancing features in another article. Links to follow.