
Restoring an Exchange 2010 mailbox via Symantec Netbackup 7.5.0.1.
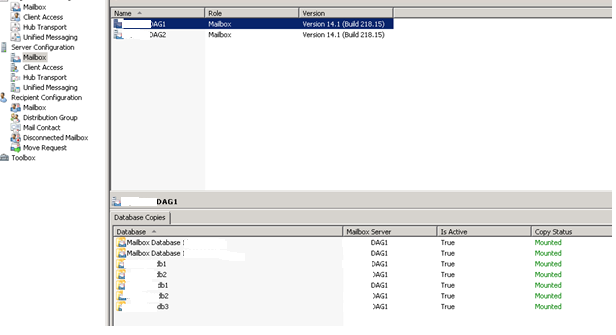
Logon to a passive DAG. To confirm which node is passive, open the Exchange Management Console/Server Configuration/Mailbox Click on the active server and you should see all the mailboxes listed underneath as MOUNTED.
Next, you will need to designate a volume accessible by the passive DAG which has enough space to house your restored database.
Open the Exchange Management Shell
Run the command listed below. Create the directory on the designated volume (E: in our example) Create a unique name for the recovery database (rdb04022013 in our example). The name of the .EDB must be the name of the actual database you are restoring from.
New-MailboxDatabase -Recovery -Name rdb04022013 -Server DagServerName -EdbFilePath ”E:Restore04022013ActualDBName.EDB” -LogFolderPath “E:Restore04022013rdblogs”

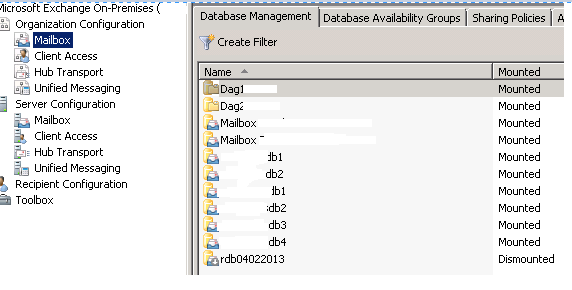
Within Exchange Management Console you will see the database get created. You may need to do Actions/Refresh in order to have it show up. It will be unmounted. You will need to mount the database and then check the directory you created to ensure all the log directories and EDB file were created. You will then need to unmount the database again.
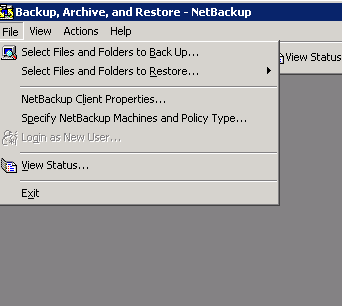
Log into your Netbackup Administration Console server and launch Backup, Archive and Restore.
In the Backup, Archive and Restore box, click File/Specify Netbackup Machines and Policy Type. Select your Netbackup server you want to use for the restore.
Select the Netbackup server you want to use for the restore. Select your source. Select your destination. Change the policy type to MS-Exchange-Server.

Click OK. Then at top of Backup, Archive and Restore box, choose Select for Restore/Restore from Normal Backup. Select your date range. You will need to select all the boxes in the date range. Do this by selecting first box and then hitting the shift button and select the last box.
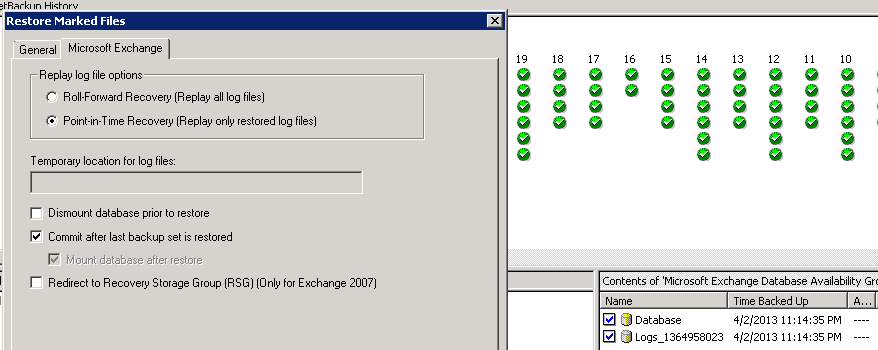
Select the database you require including the LOGS directory. Then on the left side of box, select the Start Restore of Marked Files (icon right underneath binoculars)
In the Microsoft Exchange Tab, select Point-in-Time Recovery and leave Commit after last backup set is restored click on (Mount database after restore is selected by default with this option)
Under the General Tab, select Restore Everything to a different location (maintaining existing structure)
In the destination, the ONLY thing you will need to change is after Microsoft Information Store remove the name of the live database and replace it with name of your restore database.
Microsoft Exchange Database Availability Groups: dag1.yourcompanyname.comMicrosoft Information Storedb1
CHANGE TO
Microsoft Exchange Database Availability Groups: dag1.yourcompanyname.comMicrosoft Information Storerdb04022013 (for our example)
You can then click on Start Restore. You will be prompted to view progress. Say Yes.
You can then go back to the passive DAG server you are working on and go the directory you created on E: You will see that your EDB file shows the new size of the restore file. This will just help you confirm restore has successfully started writing.
The restore can take some time depending upon your environment. In the meantime, create a restore mailbox. Use the naming convention such as restoreinitialsofperson
After NBU reports the job has completed, go back to EMC. It will take up to 5-10 minutes before the database goes from unmounted to mounted. Just keep hitting refresh.
Once you see your restore database mounted, you will need to go back into shell and run the command below. You will be prompted with an Are you Sure? message.
New-MailboxRestoreRequest -SourceDatabase rdb04022013 -SourceStoreMailbox “DisplayNameofMBYouAreRestoring” -TargetMailbox NameofMBYouCreated -AllowLegacyDNMismatch
Select Y and hit enter. You will then see a turquoise box pop up. See below. Wait until this clears out. The time will depend on the size of the mailbox.

When this completes, you can then log into the mailbox you created (restoreinitialsofperson) This again, takes time to populate so perhaps wait 10 minutes after Step 18 completes before logging in
Done