Prior to starting the restore there are a few pre-requisites we will assume have been completed such as having ISCSI enabled on the NetApp filer, an ISCSI initiator on the server you are doing the restore from, the proper version of SnapDrive installed, and that you have your Exchange Snapshot jobs running and completing successfully on your Exchange systems.
First step in starting the restore is to open SnapDrive. We will use SnapDrive to mount the snapshot copy on your NetApp Filer.
Right click disks then click “connect disk”.

Click Next.

Select the LUN that contains the database you want to mount.
Expand the .snapshot folder, choose the date you want to restore from, expand the qtree, and then select the LUN. Click next.

Choose dedicated and then hit next.

Assign an available drive letter, click next

Select the initiator used to connect back to the storage system, click next.

Select Automatic, and then click next.

The summary page will display all of the settings you have chosen, verify they are all correct and click finish. This will begin the process of mounting the snapshot you’ve chosen.

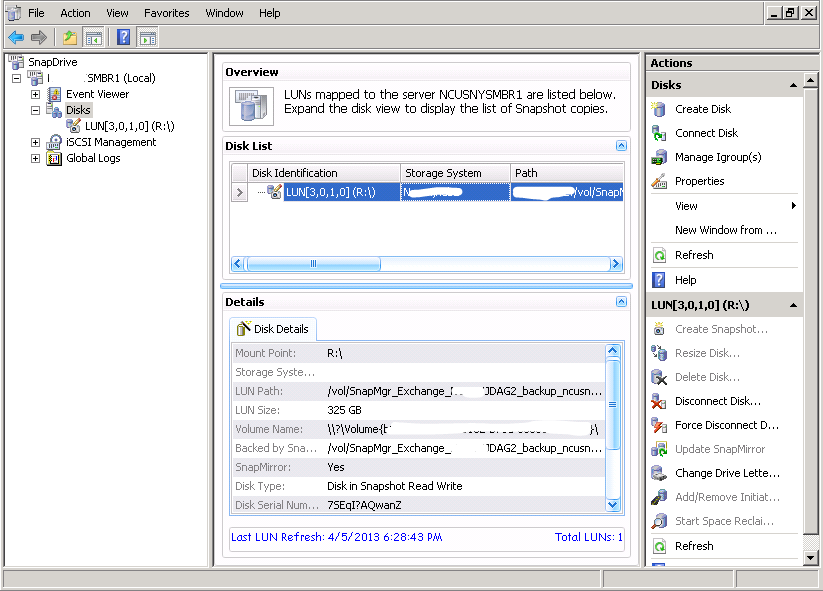
After completion you will see the details of the mounted disk. Now we will use SMBR to attach the drive we specified (in our case it is s:) and view all of the mailboxes.
Launch the Single mailbox Recovery console

File -> Open -> Source

On Source file browse to the drive specified and select the .edb file you want to restore from. Log file and Temporary path will usually fill in automatically. If not specify the locations then click OK.

Once all the mailboxes enumerate you can select the mailbox you want to export. For this example we will export an entire mailbox to a PST. Right click the mailbox and select export.


Choose PST in the format menu and pick a location to export to.

Choose the top option and hit OK.

The export will start and display the progress as it moves along. When complete hit close and verify the PST file is in the specified location

