
Synching up SME SnapInfo directories using SME – Netapp’s SnapManager for Exchange 2010.
It is important to keep your sme_snapinfo directories in synch and up to date with the backup policy you have established for your Exchange environment. If there are issues and SME is not properly removing the log folders you could potentially run out of space on your Exchange transaction log directories, depending upon where the sme_snapinfo folders were originally setup to reside.
One quick way to check to see if Netapp Snapshot and SME are in synch is to open an SSH session on your Netapp filer and run the following command:
snap list – n
This will show which directories are actually updated and which directories are expected to be there per your policy.
There are occasions when the backup log folder created by SME can become out of synch though. One common cause is if an Exchange Admin is required to delete some of the backup folders in the sme_snapinfo directory to regain space quickly.
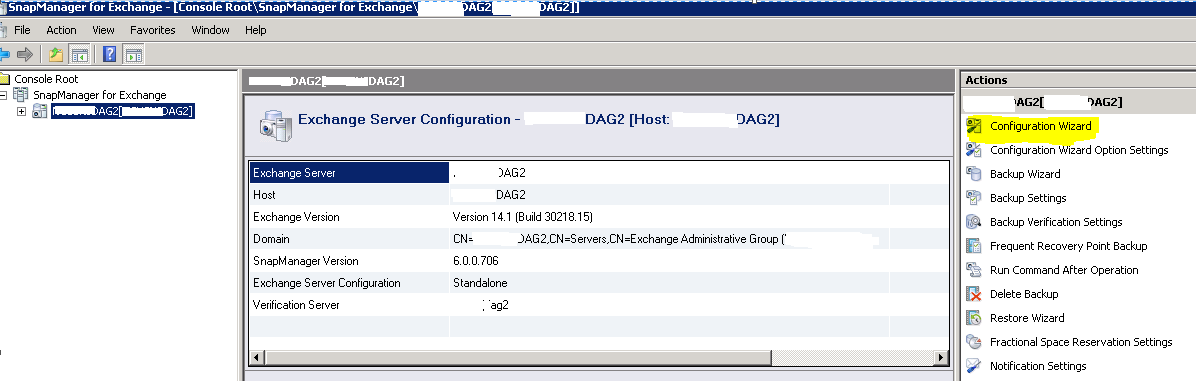
In order to do this properly, you will want to first run the SME Configuration Wizard. No changes will be necessary; you just want the process to run to ensure it is up to date. The configuration wizard can be found by opening SME. Click on the DAG on which you are working in the left hand pane. Select the Configuration Wizard at the top of the Actions Pane on the right hand side.
A few notes on the wizard:
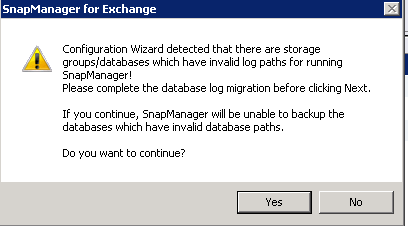
You may receive a popup alert if you have any databases that may be on local storage vs. Netapp. Click Yes to continue.
Regarding the Add Microsoft iSCSI Service Dependency screen – choose the appropriate selection for you environment.
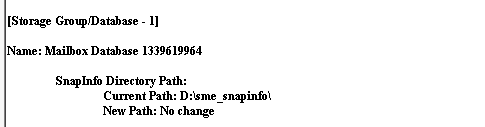
On the Completing the Configuration Wizard screen, take the time to scroll down to make sure that all items show No Change. Then Click finish.
The Configuration Status will pop up. Click Start Now. It will run through each task and once completed it will have Status of green check mark.

You are now ready to run Delete Backup. This is also found in the same pane as the Configuration Wizard about half way down the Actions List.
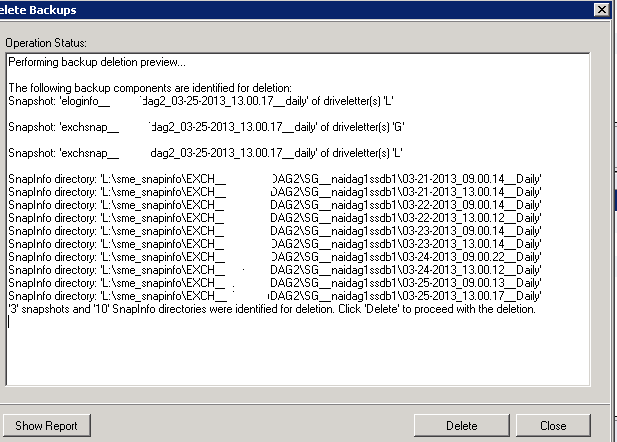
The Delete Backups window will appear. Be sure to select the correct settings for what you want to do: Which database, Management Group and the Backups to Delete section. **The first selection under Backups to Delete is Delete oldest backup in excess of # of days. This does not work as well as selecting the third option which is Delete backups older than # of days.
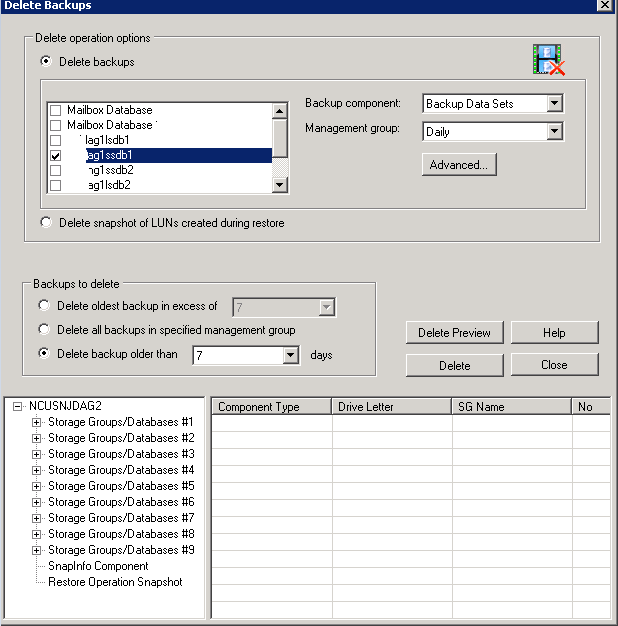
After you make your selections, click on Delete Preview. Takes a few minutes but it is worth it! It will generate a preview of snaps to be deleted. If it looks good, you can select Delete.
Complete this process for each database you want to run the Delete Backups process on.