
Using the Server Manager Module in PowerShell is a quick and easy way to view or install roles and features on your server. It’s much quicker than using the GUI and is also useful to know when doing such things as scripted installs.
To get started, open PowerShell as Administrator and type the following to import the server manager module (if you are using PowerShell 3.0 there is no need to import the module as it will be imported automatically upon using the first cmdlet from the module). Type the following command:
Import-Module servermanager

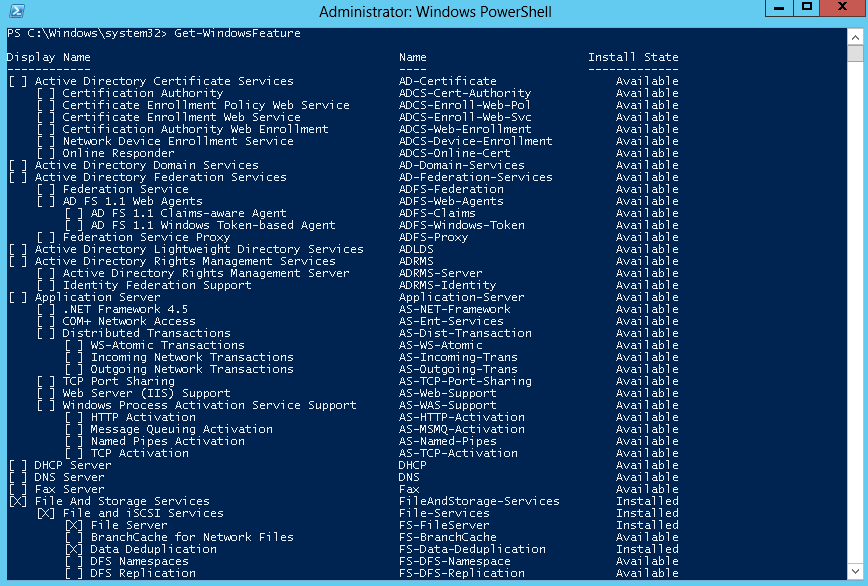
A good place to start would be by looking all the available Roles and Features on the server. You can do this by using the “Get-WindowsFeature” cmdlet. Type the following command:
Get-WindowsFeature
As you can see from the Windows Below, this particular server has some “File and Storage Services” installed and you can also what is available.
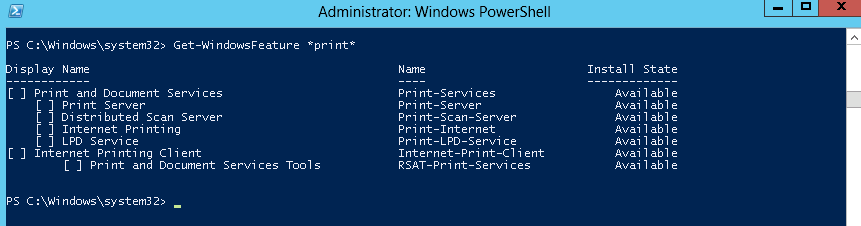
Now if you didn’t want to see every role and feature available but were only interested in let’s say “Print and Document Services”. To avoid having to scroll thru the entire list you could type the following:
Get-WindowsFeature *print*
The above command would return all the Roles and Features containing the word “Print” as shown below.
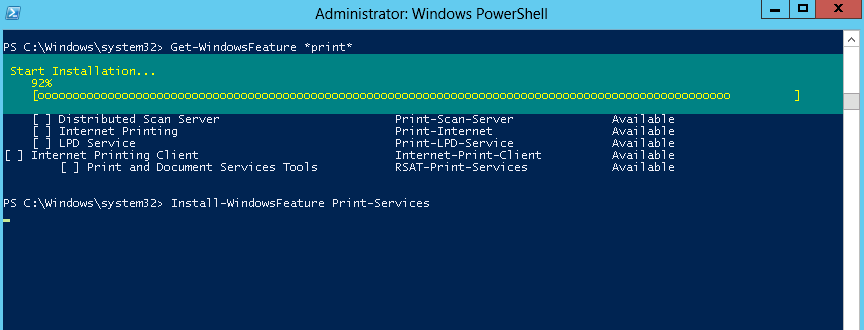
Ok, now if you wanted to install the role of “Print Server”. You can simply do this by using the “Install-WindowsFeature” cmdlet (In PowerShell 2.0 use the “Add-WindowsFeature” cmdlet) using the “Name” field retrieved from the Get-WindowsFeature “ cmdlet . Type the following command:
Install-WindowsFeature Print-Services
Installation will start with a status as shown below.
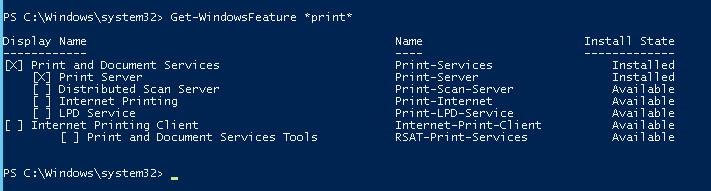
Upon completion, you will see if the install was successful, whether a restart of the servers needed and the Feature Result as shown below.

Also, If you type Get-WindowsFeature *print* you can see it is now in an “Installed State” as shown below.
Now if you would like to remove this role from the server you can use the “UninstallWindowsFeature” cmdlet (In PowerShell 2.0 use the “Remove-WindowsFeature” cmdlet). Type the following to remove the “Print Server” role:
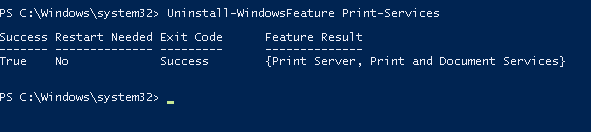
Uninstall-WindowsFeature Print-Services
“Printer Server” Role is removed as shown below.
When in adding and removing Roles and Features, if a reboot is required you could add the “-reboot” parameter and if a reboot is required it will happen automatically (in the case of the print server role a reboot is not required so the –reboot will be ignored).
Install-WindowsFeature Print-Services –restart
I hope this helps. If you would like to see more of what these commands can do you can always check the help by using the Get-Help cmdlet. As always, if you have any questions or feedback, please leave a comment.
Related Links:
Getting Started With PowerShell 2.0
Recording the Commands and Output of a PowerShell Session to a text file in PowerShell 2.0